Adjust Match Settings and Game Mode
Set Game Mode
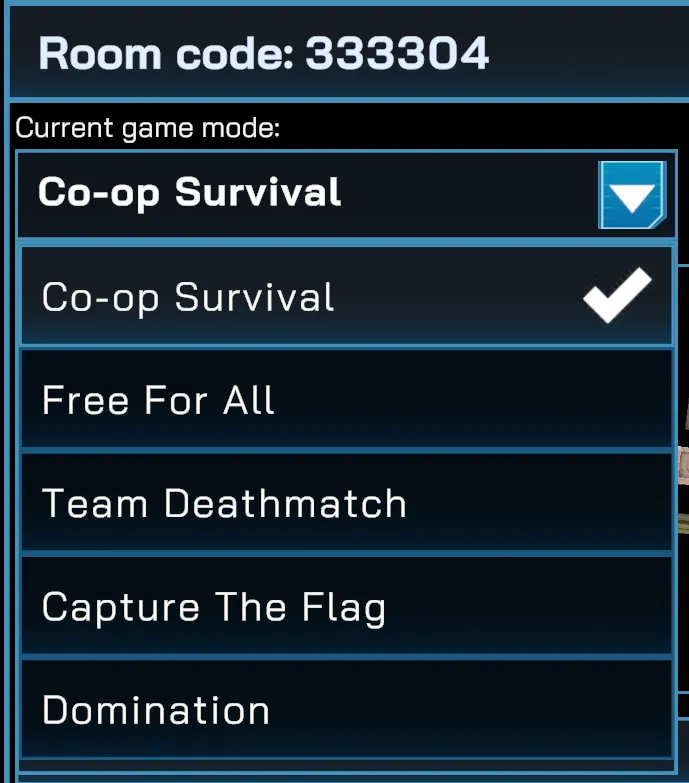
Section titled “Set Game Mode”Choose the game type for your session:
- Co-op Survival Mode — players team up and take on the challenges against bots
- Free For All — every player competes individually.
- Team Deathmatch — players are divided into teams; the team with the most eliminations wins.
- Capture the Flag (team-based) — capture the enemy flag and return it to your base.
- Domination (team-based) — hold control points to earn points over time.
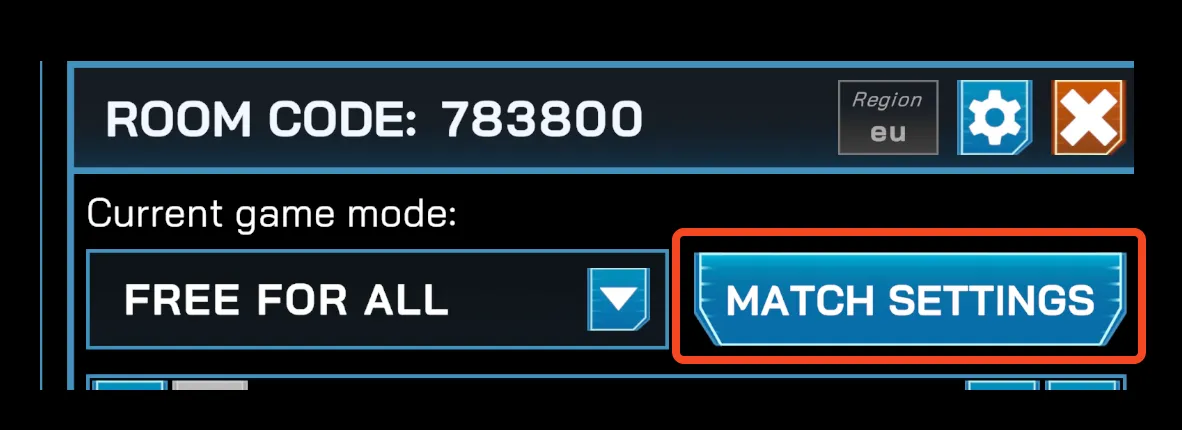
Match Settings
Section titled “Match Settings”The Arena Host Settings panel lets you configure match rules and objectives:
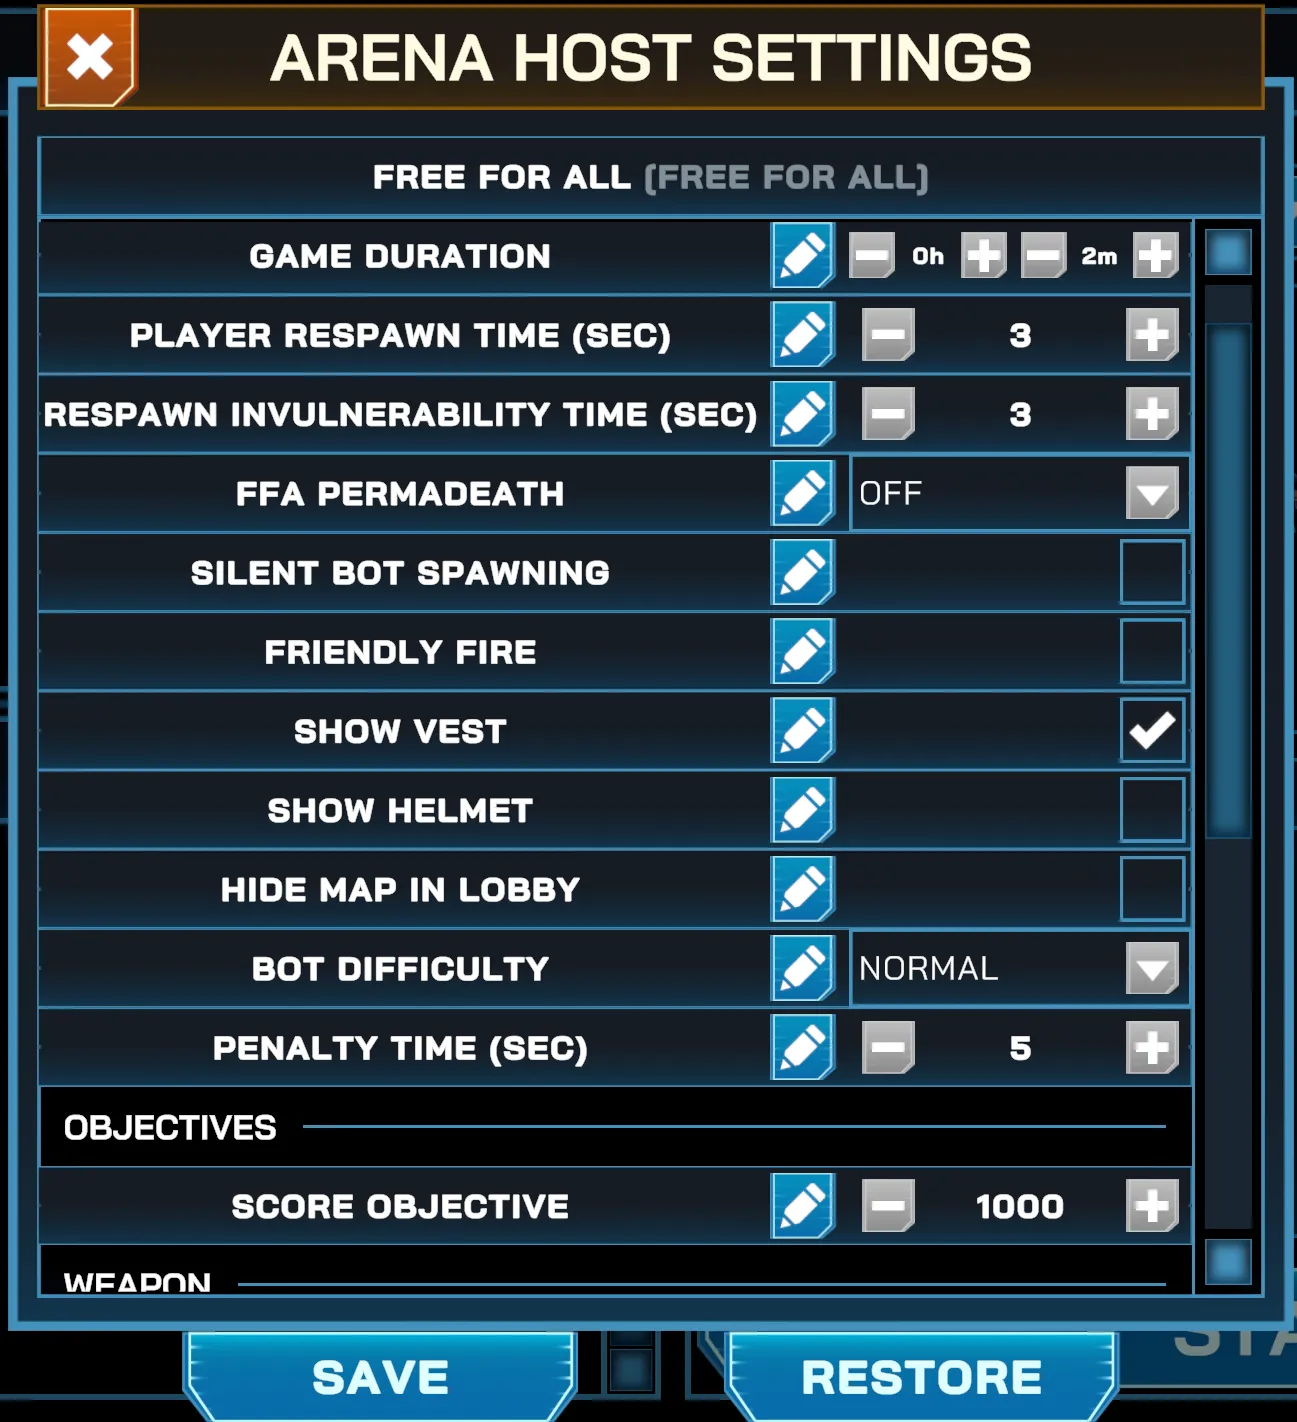
- Game Duration — sets the total match length, adjustable in hours and in minutes
- Player Respawn Time (sec) — sets the delay before players respawn.
- Respawn Invulnerability (sec) — sets the time players are protected after respawning.
- Team Permadeath / FFA Permadeath — toggles permanent elimination in the match.
- Silent Bot Spawning — toggles the audio intensity when bots spawn. This setting is great for stealth based matches.
- Friendly Fire — sets if players can be damaged or be eliminated by their own team.
- Show Vest — toggles visibility for the vest visuals
- Show Helmet — toggles visibility for the helmet visuals
- Hide Map on Lobby — hides the map objects in the lobby before a match begins. Players would still see game mode objectives, such as the flags and the domination zones, and player spawn zones.
- Require Players in Spawn Zones at Match Start — enforces players to be in the spawn zone when the match starts. Anyone outside during that time is penalized until they go back to the spawn zone. This is only available on team based game modes: Team Deathmatch, Capture the Flag and Domination
- Show Arrow to Spawn Zone in Lobby — toggles visibility of an arrow guiding players toward their respective team spawn zone before a match starts. This is only available on team based game modes: Team Deathmatch, Capture the Flag and Domination
- Bot Difficulty — adjusts how challenging the bots are. Choose between Easy, Medium or Hard presets
- Penalty Time — time players are penalized (i.e. cannot be able to shoot) when they pass through barriers and other map objects
Objectives
Section titled “Objectives”- Score Objective — sets the total points needed to win the match.
- Flags Objective — sets the number of flag captures required.
- Domination Objective — sets the points required for Domination mode.
- Life Mode (Co-op Survival) — sets the life mode to following
- Individual Player Lives — how much each player’s life has (enables a separate rule to set this value)
- Shared Team Lives — how much total lives the team has (enables a separate rule to set this value)
- Permadeath
- Unlimited Lives
- Show Distance to Objective — toggles visibility for the distance information to the objectives (Flags and Domination Zones). This is only available on objective-based game modes: Capture the Flag and Domination
Weapons
Section titled “Weapons”- Damage Modifier — sets the damage done by the weapons.
- Damage Box Damage Modifier — sets the damage done by the damage box map objects
- Weapon Source — sets how weapons are spawned in the match
- Spawners — weapons are spawned through weapon spawner objects scattered across the map.
- Holsters — weapons are spawned through holsters attached to each player’s body
- Weapon Respawn Time per Type — toggles whether each weapon’s respawn time can be set individually. When off, only one setting (Weapon Respawn Time (sec)) is shown.
- Weapon Despawn Time (sec) — sets the delay before the weapons disappear.
- One-Handed Firing Allowed — toggles whether two-handed weapons can be fired while being held with one hand.
Weapon Spawners
Section titled “Weapon Spawners”- Single Weapon per Spawner — toggles whether only one type of weapons spawns in the spawner
- Enable Allowed Weapons — toggles whether specific weapons are allowed or restricted from spawning in the spawner. Turning this setting on enables the following:
- Allowed Weapons — specific weapons that are allowed to spawn
Holsters
Section titled “Holsters”This group sets which weapons are allowed to spawn in each individual holster. Choose “All” or specific sets of weapons.
- Back Left Holster
- Back Right Holster
- Chest Left Holster
- Chest Right Holster
- Waist Left Holster
- Waist Right Holster