Streaming from the Meta Quest Headset (with Pass-Through)
Simple setup
Section titled “Simple setup”-
First-time connection
- Plug the headset into your PC via USB.
- You must repeat this step after a headset restart or if ADB is used from another PC.
-
Download the toolset (Windows or macOS)
https://drive.google.com/drive/folders/1Lg8_UuqdL684hmial2fm_BOh2-wS1RZq?usp=sharing
-
Set headset IP address
- On the headset: Settings > Wi-Fi > (your connected network) > Scroll down > IP address
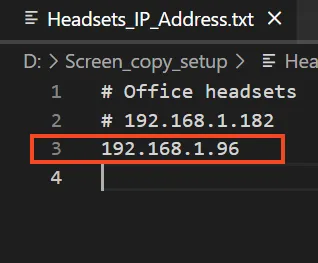
- In the downloaded folder, open
Headsets_IP_Address.txtand:- Enter the headset IP address (you can add multiple, but start with just one).
- Use
#to comment out addresses you don’t need. - Save the file.
-
Run the provided scripts (double-click or drag into Terminal on macOS):
-
Quest_streaming-
Lets you choose resolution (1920p or 1280p).
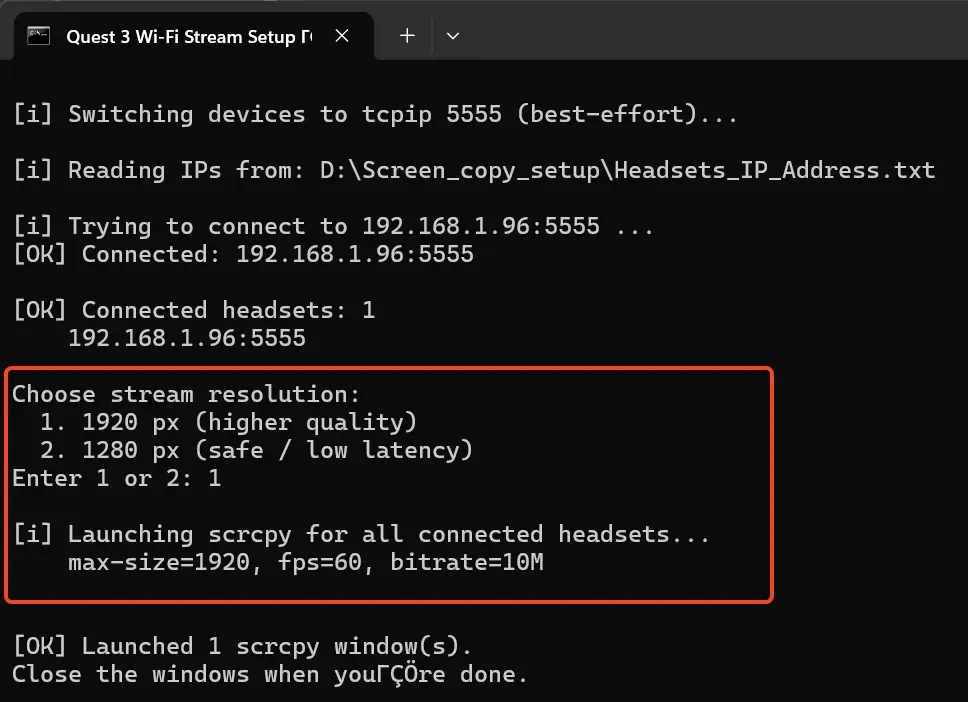
-
Recommended and most performant method.
-
Supports streaming from up to 8 headsets simultaneously.
-
Captures both eyes view.
-
Use OBS (or other software) to crop and broadcast the feed.

-
-
Quest_streaming_cropped- Uses included ffplay library to crop the image (showing only one eye).
- Much less performant.
- Not recommended for more than 2 simultaneous streams (depends on PC performance).

-
Advanced setup
Section titled “Advanced setup”Requirements
Section titled “Requirements”- A PC (Windows, macOS, or Linux).
- USB-C cable to connect the headset.
- ADB (Android Debug Bridge) installed (scrcpy requires it).
- scrcpy downloaded and extracted.
On the Meta Quest headset
Section titled “On the Meta Quest headset”- Put on your headset.
- Open Settings > System > Developer.
- Enable USB Debugging.
- If you haven’t already, you’ll need to enable Developer Mode in the Meta Quest mobile app first.
On your PC
Section titled “On your PC”- Connect your Meta Quest to the PC via USB-C.
- The headset will show a “Allow USB Debugging?” prompt — select Always allow from this computer and confirm.
- Find your headset IP address (Settings > WiFi > scroll down to IP Address)
- Connect your headset with USB cable to your PC
- Accept the “Allow USB debugging” prompt inside the headset - Always allow
- Run command:
adb tcpip 5555 - Disconnect the USB cable
adb connect IP_ADDRESS:5555- If you get cannot connect error
adb kill-serveradb tcpip 5555- try adb connect again
- It might ask for permission on the headset again
- Then it should say: connected to IP_ADDRESS:5555
- run
scrcpy -s IP_ADDRESS:5555- if your download folder of scrcpy is C:\scrcpy-win64-v3.3.1\scrcpy.exe run it as
C:\scrcpy-win64-v3.3.1\scrcpy.exe -s IP_ADDRESS:5555 - similarly on macOS
/DOWNLOAD_PATH/scrcpy-macos-aarch64-v3.3.1/scrcpy -s IP_ADDRESS:5555 - you can run it directly without the inserting the full path if you add scrcpy to to your common paths
- it works also without ip address, but you can use it to connect to multiple headsets
- if your download folder of scrcpy is C:\scrcpy-win64-v3.3.1\scrcpy.exe run it as
SCRCPY parameters
- —video-bit-rate=20M
- —max-size=1920
- —max-fps=30
ADB commands
adb kill-serveradb tcpip 5555adb connect IP_ADDRESS
Cropped version (stream)
- windows
- macOS:
-
/tmp/scrcpy.mkv is a record path
scrcpy --video-codec=h264 --no-playback --max-size 4128 --record /tmp/scrcpy.mkv --record-format=mkv & \ ffplay -probesize 1M -analyzeduration 0 -fflags nobuffer -flags low_delay -i /tmp/scrcpy.mkv -vf "crop=iw/2:ih:iw/2:0,scale=-2:1080"
-